In this blog, we will look at the advantages and disadvantages of ultrasonic testing in detail. Ultrasonic testing or UT is a technique of non-destructive testing (NDT) that is based on the propagation of the ultrasonic waves in the material or object being tested.
In the most common ultrasonic testing applications, short ultrasonic pulse-waves having the center frequencies from 0.1 to 15 MHz and sometimes up to 50 MHz, are transmitted into the materials for characterizing materials or detecting internal flaws.
One such common example is the measurement of ultrasonic thickness that tests the thickness of the test subject, such as, for monitoring the pipework corrosion.
Often the ultrasonic testing technique is performed on steel as well as other alloys and metals, though, it can also be carried out on wood, composites, and concrete, even though with a lesser resolution. It is incorporated in several industries that include metallurgy, steel and aluminum construction, automotive, aerospace and several other transportation sectors.
How does Ultrasonic Testing work?
In the technique of Ultrasonic Testing, an ultrasound transducer is connected to a diagnostic machine. This is then passed over the subject or the material that is to be inspected. The transducer is separated from the test material or object with the help of a couplant such as oil, or water. However, couplant is not needed when the Ultrasonic Testing is carried out by using an Electromagnetic Acoustic Transducer (EMAT).
Ultrasonic Flaw Detectors
Amongst all the applications of Ultrasonic Testing, flaw detection with the help of ultrasonic flaw detectors is the most commonly used technique. Typically, sound waves of a higher frequency get reflected from the flaws and in turn, tend to generate clear echo patterns. Portable instruments then record as well as display these patterns of echo.
Ultrasonic testing is hence, a safe testing method that is being widely used in several service and production industries all across the globe, generally in the applications wherein structural metals as well as welds are being used.
The fundamental theory of ultrasonic flaw detector machine
Sound waves refer to mechanical vibrations that tend to pass through different mediums like solid, liquid, or gas. They pass at a very specific velocity and in an expected direction. If these waves bump into a boundary that has a different medium, they get transmitted back. This is the principle behind ultrasonic flaw detectors and ultrasonic crack detection.
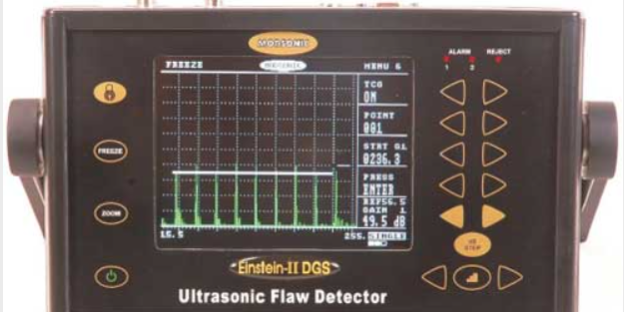
The Modsonic EINSTEIN-II DGS ultrasonic flaw detector features built-in DGS/AVG curves to evaluate time-proven flaw sizes. On the other hand, the Modsonic Arjun10 flaw detector features just a one-hand operation and weighs 800gms only.
While the ultrasonic flaw detector price tends to vary for these types of machines, it isn’t as important as finding out a quality ultrasonic flaw detector that would help the technicians find out more flaws in just one testing session.
Advantages of Ultrasonic Testing
- Higher penetrating power allows the flaw detection deep in the part.
- Higher sensitivity allows the detection of even extremely small flaws.
- In several cases, only one surface requires to be accessed.
- Higher accuracy than the other non-destructive testing techniques to find the depth of the internal flaws as well as the thickness of the objects having parallel surfaces.
- Has some capacity to estimate the orientation, size, nature and shape of the defects.
- Has some capacity to estimate the structure of different alloys of the components having different acoustic properties.
- Not hazardous to operate or to nearby people and doesn’t have an effect on the materials and equipment vicinity.
- The results obtained are immediate and hence the spot decisions can be made immediately.
Disadvantages of Ultrasonic Testing
- Manually operating it needs careful attention by experienced professionals.
- Extensive technical knowledge is needed to develop inspection procedures.
- Parts that are irregular in shape, rough, very thin or small, and not homogenous are tricky for inspection.
- The surface should be prepared well by thoroughly cleaning and removing the loose pant, scale, etc. even though the paint that is bonded properly to the surface doesn’t need to be removed.
- Couplants are required for providing effective transfer of the ultrasonic wave energy between the transducers and the parts that are being inspected until a non-contact technique gets used.
- The inspected items should be waterproof whenever water-based couplants are used that do not have rust inhibitors. In these situations, anti-freeze liquids having inhibitors are generally used.
The technique of ultrasonic flaw detection is known to be a comparative method. Though some analogue-based ultrasonic flaw detectors are still manufactured, most of the modern instruments inculcate digital signal processing for promoting enhanced accuracy and stability.


