There are more than one NDT methods. Non-destructive testing or NDT is an analysis and testing-based technique that is used by industry for evaluating the properties of a component, structure, material, or system for welding defects or characteristic differences and discontinuities without causing any damage to its original part. NDT is also called Non-destructive Inspection (NDI), Non-destructive Evaluation (NDE) or Non-destructive Examination (NDE).
Different Types of NDT Testing Methods
The current NDT testing methods include the following.
1. Acoustic Emission Testing (AE)
Acoustic Emission Testing is a type of passive NDT technique that depends on detecting the short bursts of the ultrasound waves that are emitted from the active cracks under a load. The sensors that are dispersed over the structural surface detect AE. AE can also be detected with the help of ultrasonic flaw detectors from plasticization in stressed surfaces before the crack forms.
2. Electromagnetic Testing (ET)
The method of Electromagnetic Testing makes use of a magnetic field or an electric current that is passed through a conductive part. There are three different kinds of Electromagnetic Testing that include Eddy Current Testing, Remote Field Testing (RFT), and Alternating Current Field Measurement (ACFM).
3. Ground Penetrating Radar (GPR)
Ground Penetrating Radar is a geophysical NDT method that uses an ultrasonic flaw detector machine to send radar pulses through the material’s surface. The waves either get reflected or refracted when they come across a material boundary or a buried object having different electromagnetic properties.
4. Laser Testing Methods (LM)
The Laser Testing Method is divided into three categories that include laser profilometry, holographic testing and laser shearography.
Laser profilometry makes use of a high-speed rotating laser light source along with miniature optics for detecting pitting, cracks, corrosion and erosion when it detects the changes in the surface through a 3D image generation via surface topography.
Holographic testing incorporates a laser for detecting the changes in the surface of the material that is subjected to pressure, vibration or heat.
Laser shearography uses laser light for making the image even before the surface is subjected to stress and creates a new image.
5. Magnetic Flux Leakage (MFL)
The method of Magnetic Flux Leakage makes use of a powerful magnet for creating magnetic fields that saturate the structure of steel such as storage tanks and pipelines. A sensor is used for detecting the changes in the magnetic flux density that shows any kind of reduction due to erosion, corrosion or pitting.
6. Magnetic Particle Testing (MT)
The Magnetic Particle Testing method uses magnetic fields for finding the discontinuities near or at the surface of the ferromagnetic materials. This magnetic field is generated either through a permanent magnet or an electromagnet.
The magnetic field shows any sorts of discontinuities as the magnetic flux lines show leakage that can be seen easily via magnetic particles that are drawn towards the discontinuities.
7. Neutron Radiographic Testing (NR)
Neutron Radiography NDT technique makes use of low beam energy neutrons for penetrating the workpiece. While the beam remains transparent in the metallic materials, most of the organic materials allow this beam to be visible. This helps the internal and structural components to be examined and viewed for detecting flaws.
8. Radiographic Testing (RT)
The technique of Radiographic Testing incorporates radiations that are passed through the test piece for detecting the defects. X-rays are generally used for less dense or thin materials whereas gamma rays are used for denser or thicker objects. The results are then processed by using computed radiography, film radiography, digital radiography, or computed tomography. Whatever method is used, the radiations would show discontinuities in the material because of the higher strength of the radiations.
9. Ultrasonic Testing (UT)
The method of Ultrasonic Testing transmits high-frequency sound into an object for interacting with the features present within the material that attenuate or reflect it by using ultrasonic crack detection. The method of Ultrasonic Testing is broadly classified into Through Transmission (TT), Time of Flight Diffraction (ToFD) and Pulse-Echo (PE).
Choosing the right NDT method is crucial to optimize the performance of the NDT inspection. Since there are so many different kinds of techniques and ultrasonic flaw detectors with each having its distinct characteristics, some are perfectly suited for certain applications while they can be ineffective in the rest of the cases.
Modsonic, specializing in the area of Portable Ultrasonic Flaw Detector, features EINSTEIN-II DGS, an ultrasonic flaw detector that helps in evaluating the flaw size effectively with its built-in DGS/AVG curves and Time Controlled Gain.
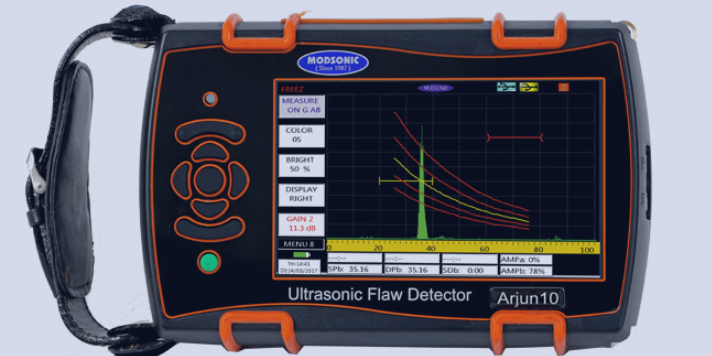
Modsonic has also come up with the New Arjun Series Ultrasonic Flaw Detectors that have three different models, Arjun10, Arjun 20 and Arjun 30.
Out of all, Arjun30 is the most advanced ultrasonic flaw detector machine that brings in revolutionary changes in the field of conventional flaw detection through its recordability as well as offline analysis, which wasn’t available in the past.
Despite its smaller size and less weight, the functions and features of Arjun30 meet all the requirements of modern conventional ultrasonic testing.
Arjun30 = Features of Arjun10 + Features of Arjun20 + Recordability and Offline Analysis


